Steps to Making a Tie Dye Shirt

I know a lot of people use the "RIT" brand but I rather use the Tulip brand. It's easier to handle and the kids can do it on their own. The kits varies in size and price. This kit only came with 3 colors and I got it for $8.97 at Walmart.

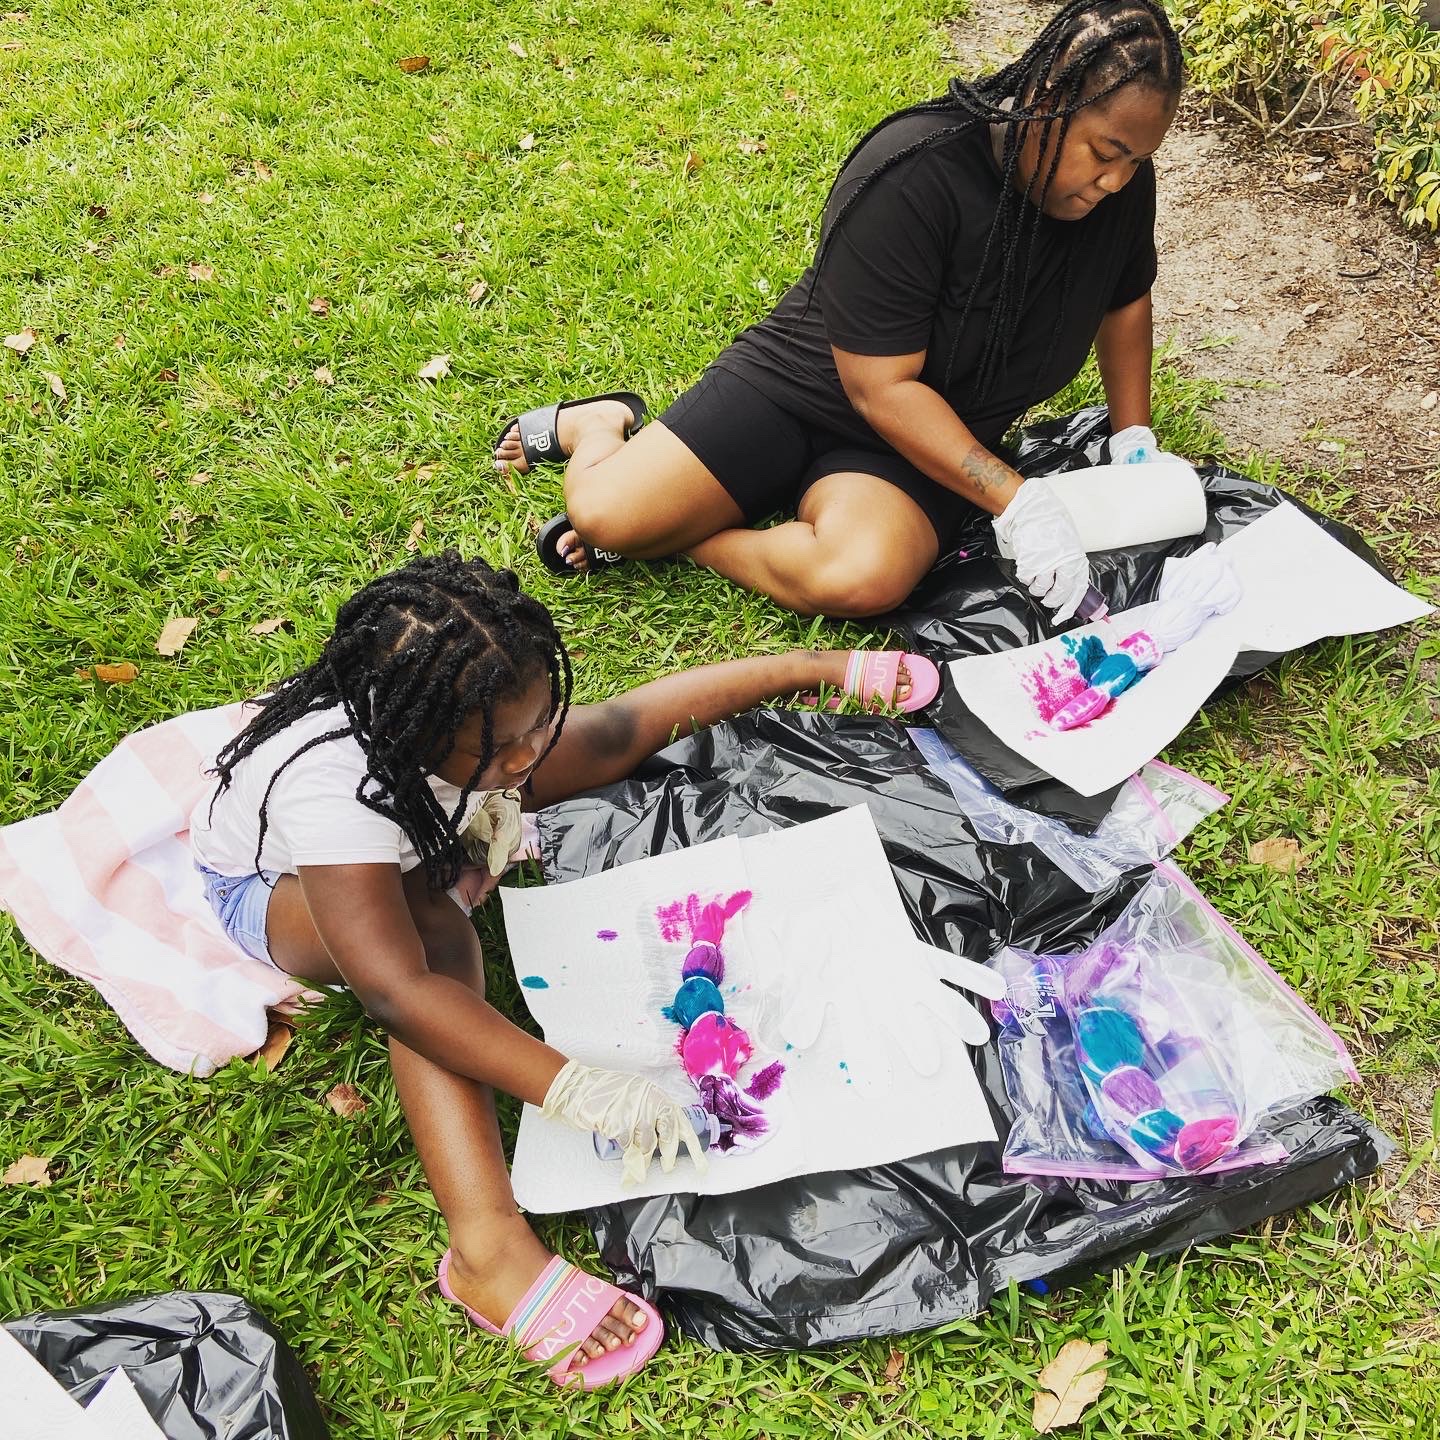
These are the materials that will be needed. White shirt(cotton or silk), 2 pairs of gloves comes in the kit, however I needed more since it was the 4 of us. It calls for a prewash, but I don't have time for that lol. So I used a spray bottle filled with lukewarm water to spray the shirt after applying the rubber bands. (Do not soak the shirt with water...just a light spray to be moist) You will also need a freezer storage ziplock bag to put each shirt in for 6-8 hrs or overnight like I did once done dyeing. The kit also comes with 20 Rubber Bands, if you are willing to try different method designs, then buy a pack of rubber bands just in case. The 3 dye bottles comes with the dye powder inside, all you have to do is fill it with water and shake it. Place your semi wet shirt on a garbage bag and paper towel to not get the surface stained.

Remember to FOLLOW these steps
1- Choose the method design you want and apply the rubber bands where its needed
2-Lightly spray the water on the shirt
3- Place shirt on garbage bag and paper towel
4-Start dyeing your shirt(I find it easier to go section to section since its already divided by the rubber bands)
5-Once done, place shirt inside a ziplock bag for about 6-8 hours. (we left ours overnight)
6-Next, remove shirt from the bag and rinse out access dye keep squeezing until there is no more dye coming out. Then cut off the rubber bands.
7-If you are dyeing more than one shirt, wash each one separately in the machine with hot water and a small amount of detergent. (non- bleach)
8- Place shirts in the dryer WITHOUT dryer sheets. I chose the lowest temp and used it for 45 minutes.

Later Love Bugs,
Elizabeth Jacas
0 comments